I just replaced my first CV axle...oh yeah! :dance2:
The job took 2-3 hours, first time, with many distractions and interruptions. I could easily do it in 1 hour now. Or 30 minutes in a hurry. First-time research and acquiring the tools & parts took much more time.
Along the way, I read all the axle threads on subaruoutback.org :6:, plus some threads on nasioc and scoobymods. Great info! So this is my contribution back to the community. I hope to make a single DIY guide including this info, plus any comments, plus info & photos from the other axle threads (especially this one and this one).
FYI... My car is a 2001 OBW H6, ~95K miles. Front left inner CV boot tore open last month. I have changed fluids, filters, pads, and plugs in the past...but never touched the suspension or driveline...so this is mostly for first-timers. Here we go...
Technical Info -- Get the factory service manual for YOUR car if you haven't already. $35 to download the entire manual, tech tips, bulletins, training modules, etc. directly from Subaru at http://techinfo.subaru.com. Then you have the right parts, torque specs, etc. for your baby. You can't rely on web forums or parts-counter jockeys for this stuff.")
Boot Replacement -- If you're considering a reboot only, first read these End Wrench articles on Drive Axle Service and Subaru Remanufactured Axles. If you can afford (time & money) to reboot your own axles, go for it! I can't justify it right now.
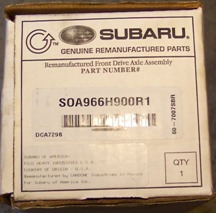
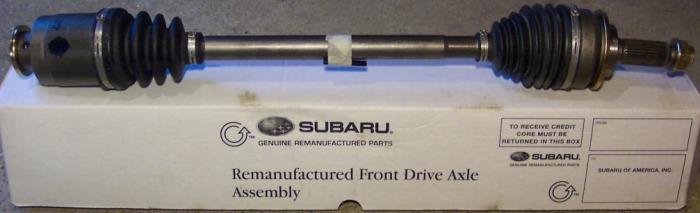
Replacement Axles -- Brand new Suby axles cost $300-400. OEM remanufactured axles cost $150-200 after the core refund. Aftermarket axles cost about $100. Your call. Buy what you can afford and justify. IMO a brand-new axle is overkill for a 100K car...but I also don't want to take ANY chances with poor fit, missing pieces, or vibration...so I got the OEM reman. If you want cheaper, others on these forums have recommended MWE remanufactured Suby axles, or aftermarket Cardone axles, or aftermarket GCE axles. If you go aftermarket, make sure it has the baffles installed on both ends, and that it takes a spring pin for the inner shaft.
Pre-Inspection -- Remove the wheel. Inspect the suspension bushings and ball joint rubber to see if anything needs replacing while you're in there. Inspect the bolts that you will remove, and double-check their sizes. If they are rusted, you might apply some penetrating oil now. If they are rounded, you might need more tools or other strategies. Also inspect your other CV boots. If others are about to go, you might as well replace them now and avoid the greasy mess in the future.
Lifting -- Jack the car as high as possible, so you can work comfortably underneath. You will need enough clearance to remove and replace the axle spring pin. Plus you might spend a LOT of time down there to clean up the grease from a torn boot.
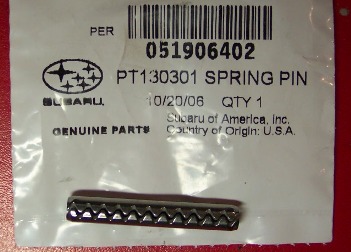
Axle spring pin -- I used a 3/16" pin punch to remove the old pin, and a 7/32" pin punch to align the holes before inserting the new pin. Either size can do both jobs. In a pinch, you could use a drill bit. The spring pin length is about 1.75". The Subaru reman axles come with a new pin.
Axle nut -- Get the correct replacement nut before you start the job. My 2001 H6 uses the olive/gray nut on all 4 axles. The OEM reman axle came with the gold nut. They have different torque specs, for different bearings. Read your service manual.
Axle pulling -- My axle just slipped right out, both ends, surprised me! But this is California. If you have rust, make sure you have an axle puller. IMO, whacking the axle with a hammer, or a blow torch, or penetrating oil, can mess up the wheel bearings. A smooth press with an axle puller is better.
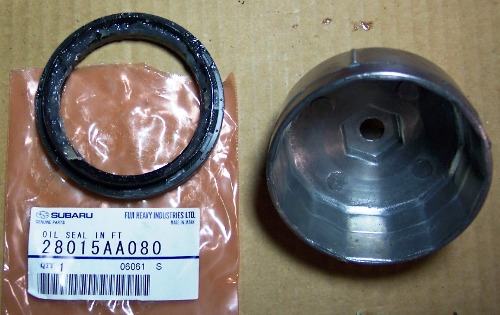
Oil seals -- The service manual says "When front drive shaft is to be replaced, also replace inner oil seal." OK...which inner seal? The "inner" end of the axle fits over the differential output shaft, which has a small recessed oil seal. The outer end of the axle goes into the hub, which has a large exposed "inner oil seal". Read your service manual, and it should be obvious. If you ask the guy at the parts counter for an oil seal, he will probably sell you the wrong part.
Tools -- nitrile gloves, paper towels, basin for greasy towels, rags, small brass brush, floor jack, jack stand, good flashlight, breaker bar with 32mm socket, socket driver with 12mm/14mm/19mm sockets, extra 12mm wrench (or adjustable wrench or pliers), beater screwdriver with ~3/16" standard head, 3/16" pin punch, 7/32" pin punch, claw hammer, axle puller, small pry bar, 80 ft-lb max torque wrench, 150+ ft-lb max torque wrench
Removal -- Park, cool down, set parking brake, crack lugnuts (19mm), jack & support, remove wheel, unstake axle nut, stick screwdriver between rotor discs against caliper, remove axle nut with breaker bar, unlock steering wheel, shift to neutral, remove inner axle pin with punch, unbolt stabilizer endlink from transverse arm (12mm bolt & nut), remove balljoint pinch bolt from hub (14mm bolt), hammer screwdriver into pinch bolt gap, pull down on transverse arm to remove balljoint, pull hub out with one hand while holding axle with other hand to remove. If stuck, use axle puller.
Inspection & Cleaning -- Inspect differential output shaft splines and wheel hub receiver splines. Clean both sides with brass brush & rag. Inspect differential oil seal for leaks, and hub oil seal for dirt & wear & tear. Replace as necessary. Inspect ball joint (see service manual) and replace if necessary. If the CV boot was ripped, clean up as much grease as you want. Focus on the exhaust system and any area that might drip onto the exhaust system. Try to avoid pushing the grease under the heat shield. Remove the heat shield for cleaning if you want.
Installation -- Align inner axle with differential output shaft so the spring-pin holes match up. Look closely - just ONE position will work. Push axle onto diff. Pull out on hub, slide axle into hub, and replace axle nut. Open balljoint pinch gap with screwdriver, insert balljoint into hub, and replace bolt. Jack up transverse link until stabilizer link is aligned, and replace nut & bolt. Slide under the car, pull inner axle fully onto diff shaft, and replace the spring pin. Torque nuts/bolts to spec (37, 22, and 159 ft-lbs on my 2001 H6). Stake axle nut with punch. Replace wheel, install lugnuts, lower, and torque to spec (65 ft-lbs on my 2001 H6).
Other work -- While you're in there, you might as well inspect your inner brake pad, wheel bearing, ball joint, and suspension bushings. And clean whatever you care to clean.
Pictures follow below.
Share, enjoy, and please reply with any tips! Thanks.
-Jeff
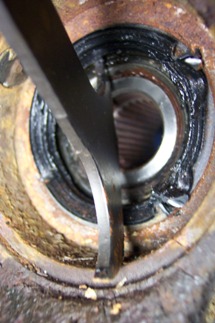
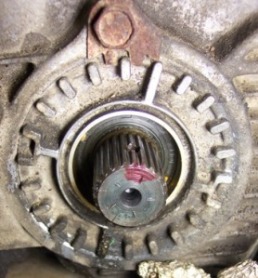
1) Inner axle with spring pin removed from beneath car.
![Image]()
2) Two suspension bolts removed. Stabilizer endlink on left (12mm bolt & nut). Balljoint retainer on right (14mm bolt only).
![Image]()
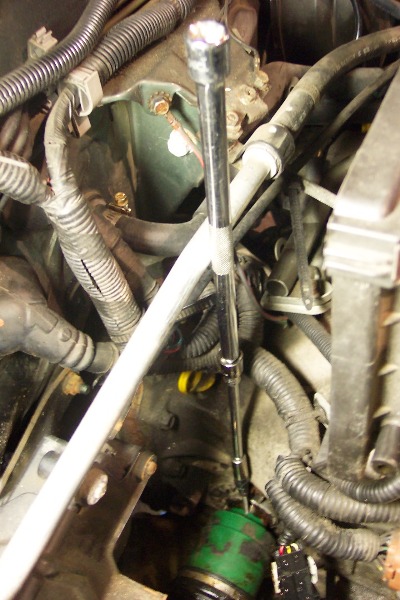
3) Tapped screwdriver into balljoint pinch gap to remove the balljoint.
![Image]()
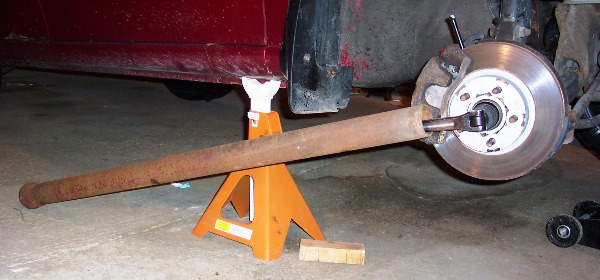
4) Axle puller that I didn't need (free loan or $25 purchase at autozone)
![Image]()
The job took 2-3 hours, first time, with many distractions and interruptions. I could easily do it in 1 hour now. Or 30 minutes in a hurry. First-time research and acquiring the tools & parts took much more time.
Along the way, I read all the axle threads on subaruoutback.org :6:, plus some threads on nasioc and scoobymods. Great info! So this is my contribution back to the community. I hope to make a single DIY guide including this info, plus any comments, plus info & photos from the other axle threads (especially this one and this one).
FYI... My car is a 2001 OBW H6, ~95K miles. Front left inner CV boot tore open last month. I have changed fluids, filters, pads, and plugs in the past...but never touched the suspension or driveline...so this is mostly for first-timers. Here we go...
Technical Info -- Get the factory service manual for YOUR car if you haven't already. $35 to download the entire manual, tech tips, bulletins, training modules, etc. directly from Subaru at http://techinfo.subaru.com. Then you have the right parts, torque specs, etc. for your baby. You can't rely on web forums or parts-counter jockeys for this stuff.
Boot Replacement -- If you're considering a reboot only, first read these End Wrench articles on Drive Axle Service and Subaru Remanufactured Axles. If you can afford (time & money) to reboot your own axles, go for it! I can't justify it right now.
Replacement Axles -- Brand new Suby axles cost $300-400. OEM remanufactured axles cost $150-200 after the core refund. Aftermarket axles cost about $100. Your call. Buy what you can afford and justify. IMO a brand-new axle is overkill for a 100K car...but I also don't want to take ANY chances with poor fit, missing pieces, or vibration...so I got the OEM reman. If you want cheaper, others on these forums have recommended MWE remanufactured Suby axles, or aftermarket Cardone axles, or aftermarket GCE axles. If you go aftermarket, make sure it has the baffles installed on both ends, and that it takes a spring pin for the inner shaft.
Pre-Inspection -- Remove the wheel. Inspect the suspension bushings and ball joint rubber to see if anything needs replacing while you're in there. Inspect the bolts that you will remove, and double-check their sizes. If they are rusted, you might apply some penetrating oil now. If they are rounded, you might need more tools or other strategies. Also inspect your other CV boots. If others are about to go, you might as well replace them now and avoid the greasy mess in the future.
Lifting -- Jack the car as high as possible, so you can work comfortably underneath. You will need enough clearance to remove and replace the axle spring pin. Plus you might spend a LOT of time down there to clean up the grease from a torn boot.
Axle spring pin -- I used a 3/16" pin punch to remove the old pin, and a 7/32" pin punch to align the holes before inserting the new pin. Either size can do both jobs. In a pinch, you could use a drill bit. The spring pin length is about 1.75". The Subaru reman axles come with a new pin.
Axle nut -- Get the correct replacement nut before you start the job. My 2001 H6 uses the olive/gray nut on all 4 axles. The OEM reman axle came with the gold nut. They have different torque specs, for different bearings. Read your service manual.
Axle pulling -- My axle just slipped right out, both ends, surprised me! But this is California.
If you have rust, make sure you have an axle puller. IMO, whacking the axle with a hammer, or a blow torch, or penetrating oil, can mess up the wheel bearings. A smooth press with an axle puller is better.Oil seals -- The service manual says "When front drive shaft is to be replaced, also replace inner oil seal." OK...which inner seal?
The "inner" end of the axle fits over the differential output shaft, which has a small recessed oil seal. The outer end of the axle goes into the hub, which has a large exposed "inner oil seal". Read your service manual, and it should be obvious. If you ask the guy at the parts counter for an oil seal, he will probably sell you the wrong part. Tools -- nitrile gloves, paper towels, basin for greasy towels, rags, small brass brush, floor jack, jack stand, good flashlight, breaker bar with 32mm socket, socket driver with 12mm/14mm/19mm sockets, extra 12mm wrench (or adjustable wrench or pliers), beater screwdriver with ~3/16" standard head, 3/16" pin punch, 7/32" pin punch, claw hammer, axle puller, small pry bar, 80 ft-lb max torque wrench, 150+ ft-lb max torque wrench
Removal -- Park, cool down, set parking brake, crack lugnuts (19mm), jack & support, remove wheel, unstake axle nut, stick screwdriver between rotor discs against caliper, remove axle nut with breaker bar, unlock steering wheel, shift to neutral, remove inner axle pin with punch, unbolt stabilizer endlink from transverse arm (12mm bolt & nut), remove balljoint pinch bolt from hub (14mm bolt), hammer screwdriver into pinch bolt gap, pull down on transverse arm to remove balljoint, pull hub out with one hand while holding axle with other hand to remove. If stuck, use axle puller.
Inspection & Cleaning -- Inspect differential output shaft splines and wheel hub receiver splines. Clean both sides with brass brush & rag. Inspect differential oil seal for leaks, and hub oil seal for dirt & wear & tear. Replace as necessary. Inspect ball joint (see service manual) and replace if necessary. If the CV boot was ripped, clean up as much grease as you want. Focus on the exhaust system and any area that might drip onto the exhaust system. Try to avoid pushing the grease under the heat shield. Remove the heat shield for cleaning if you want.
Installation -- Align inner axle with differential output shaft so the spring-pin holes match up. Look closely - just ONE position will work. Push axle onto diff. Pull out on hub, slide axle into hub, and replace axle nut. Open balljoint pinch gap with screwdriver, insert balljoint into hub, and replace bolt. Jack up transverse link until stabilizer link is aligned, and replace nut & bolt. Slide under the car, pull inner axle fully onto diff shaft, and replace the spring pin. Torque nuts/bolts to spec (37, 22, and 159 ft-lbs on my 2001 H6). Stake axle nut with punch. Replace wheel, install lugnuts, lower, and torque to spec (65 ft-lbs on my 2001 H6).
Other work -- While you're in there, you might as well inspect your inner brake pad, wheel bearing, ball joint, and suspension bushings. And clean whatever you care to clean.
Pictures follow below.
Share, enjoy, and please reply with any tips! Thanks.
-Jeff
1) Inner axle with spring pin removed from beneath car.

2) Two suspension bolts removed. Stabilizer endlink on left (12mm bolt & nut). Balljoint retainer on right (14mm bolt only).

3) Tapped screwdriver into balljoint pinch gap to remove the balljoint.

4) Axle puller that I didn't need (free loan or $25 purchase at autozone)