Subaru Outback Forums banner

Thule 250 cargo roof carrier

18K views 7 replies 3 participants last post by  austin571  
#1 ·
I have a 2013 Outback. Just got a Thule 250 - in great shape - even has the rails and mounting hardware. Will I be able to attach it to the crossbars that are standard on the outback or do I need to use their rails? If so how would I do it with the outback ones already there? I do not have the manual or directions. Any information or pictures would be appreciated.
Wow - Thule are the nicest people - explained that I would use the square racks attaching them to the rails on the outback leaving the outback rails going the length. Really happy now that I took the rails with it.
Now husband is wanting to paint it. Looking that up now. Has anyone else done that?
 
Discussion starter · #3 ·
Thanks we are looking at it now - it came with 2 long rails and 2 short rails. Thule said to attach the square original rails to the rails of the outback, But your input on the spread makes a good point. I will be pressure washing it Saturday and looking at installing Sunday, but not taking off until Friday. Just want to make sure all fits good. Sure maybe I could find the pieces for mounting at Lowes or Depot...?
 
Discussion starter · #5 ·
Finally figured out what the clamps were on the sqaure bars - clamping the rack onto the old drip channels that cars used to have. Felt like a fool trying to clamp them onto the roof rack like the Thule rep told me to. Guess that was Lightingguy was talking about with the adapters and such. Going to use the stock rack system with ubolts and metal pieces to hold the carrier on.
Now still thinking about painting it. Not sure what type of paint to use. Think the Thule 250 is more fiberglass than plastic. Or just real thick plastic.
 
Discussion starter · #8 · (Edited)
Thule 250 Cargo Carrier

Nothing ever works out!
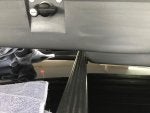
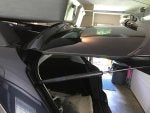
Using the subaru cross bars the thule carrier is too long - can not open the back hatch much

Then used the 450 crossovers on the thule bars that came with the carrier.
The dip in the carrier is too wide - it does not sit on the cross bars correctly.

So, enter husband with his engineering thoughts, cut a piece of 3/4 plywood - bolted to the thule square bars.
Drilled the holes no problem.
Painting the wood now - let it dry overnight.

Then will cut a piece of 3/4 plywood to go in the dip area of the carrier on the inside.

Then bolt the carrier to the plywood that is bolted to the square bars.

The thule bars - The bars barely fit - they are only about 46.6 inches, but is only a 1/4 inch from being exposed so just no end cap on them.

Plus, coming back from the hardware store I had a thought on what to paint it (but will have to wait until I get back from this trip coming up as I want to spend time painting without being rushed.) Decided on the Navy digital Camo scheme.

You may be asking - why not just a Sears XCargo top - had aone before and sold it, never thought I would need it. Silly me.
Thought about getting another one this morning when we were trying to figure out how to make this work.
But I like the old box - It is study as heck. Stuff is not as good quality as it once was.

And the hieight gained using the bars and the wood, the back hatch will open.

Will post the outcome later....This feels like the cargo carrier soap opera.
 

Attachments