Subaru Outback Forums banner

Will Brasso Polish my Hazy Headlights?

15K views 32 replies 17 participants last post by  OutbackILM  
#1 ·
The title says it all!

Brasso polished my belt buckle in Marine Corps basic training, and it cleaned stubborn stains off the floor (I mean the "deck"), but....

Will Brasso Polish my Hazy Headlights? And my foggy fog lights?

Will it cause any damage? Those snake-eye headlights are just so darn cool looking.

Thanks!
 
#24 ·
I have a Meguiars kit I use, works good.
I just used the Sylvania Headlight Restoration Kit on my 2002 VDC sedan on Sunday. Paid $20 at Advance Auto. The results are amazing! Truly amazing! The lights look like brand new! What a difference at night! I did some research before buying, and consumerreports.org rated the Sylvania kit #1. They said it is by far the longest lasting of all they tested. Also, on the product box it says, "Popular Mechanics Editor's Choice Awards 10". They must have been very impressed by it too.
I used the 3M Headlight Restore kit. It's really just different grits of sandpaper/some compound. But it was in a convenient package.

I followed the instructions (well almost, it was easier to remove the headlights than mask the area as recommended) and the whole process took about an hour. Mask, sand, sand, wet sand, wet sand, wet buff, buff, wax. If I had it to do over, I would get the drill attachment version because my arms definitely got a work out after all the sanding buffing.

The good news is it's cheap, it really works, and not only does the vehicle look better with cleaned headlights, you can SEE better at night. Seeing at night is the biggest benefit of doing all this.

My truck headlights were pretty useless at night, to the point I was thinking of upgrading them/supplementing them with additional lights.

Cleaning the lens made it so much better to see at night, I have no need for more lighting now.

Here is the only picture I took, one as it was and one treated for a before/after effect.
Thanks for the great info!
 
#4 ·
I just used the Sylvania Headlight Restoration Kit on my 2002 VDC sedan on Sunday. Paid $20 at Advance Auto. The results are amazing! Truly amazing! The lights look like brand new! What a difference at night! I did some research before buying, and consumerreports.org rated the Sylvania kit #1. They said it is by far the longest lasting of all they tested. Also, on the product box it says, "Popular Mechanics Editor's Choice Awards 10". They must have been very impressed by it too.
 
#5 ·
I used the 3M kit that had pads for use on a drill. It saved my arms and the results were amazing. The headlights look like new now. There is a sealing wax in the kit so I hope they stay clear for a long time. I have found that most short-cut miracle in a bottle cleaning solutions don't work very well or don't last very long. Do it right the first time without screwing up your lenses and you won't regret it.
 
#7 ·
Brasso? for plastics, never heard of that, ...I wonder if it will melt it.

heard of using tooth paste though, the problem is you got no sealer.

_____________

this is the kit I bought last year that has all the stuff in it, and the sealer lasts the longest as per consumer reports.

Sylvania Model 38771

amazon wants $19 for it, the parts stores typically want $25

https://www.amazon.com/gp/product/B00429NKWK


recently I bought a bottle of this from Amazon for $6.00 to use the remainder of the kit on another car
Blue Magic 725CD-06 Headlight Lens Restorer - 8 oz.
https://www.amazon.com/Blue-Magic-725CD-06-Headlight-Restorer/dp/B001PH0WUU/

I posted about it originally back on this post,...and it has held up since then REALLY REALLY Good.

http://www.subaruoutback.org/forums...forums/66-problems-maintenance/187594-first-timer-3m-headlight-restore-kit.html
 
#8 ·
Toothpaste works pretty well to remove the haze but if you are at the point where they are hazing it starts to come back pretty rapidly. My daughter's 2002 Taurus is at that point; I just polish it about 3 times a year and it's fine. I've thought about putting clearcoat over the top but it doesn't take long to polish them up so I haven't gone that route yet.
 
#9 ·
I use a combination of 3M kit and Maguiars Plast-X. Supposedly Sams Club has a deal for $30 for the pair and a 3 year no-rehaze guarantee.

I also will be getting a pair of spares from the local u-pull it and cleaning them up once they get one where the front end isn't trashed.
 
#12 ·
the turtle wax kit I used worked fine.

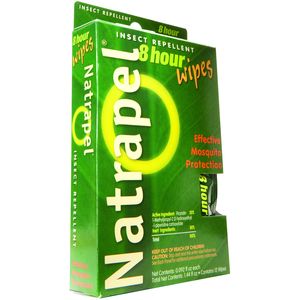
I have heard that wiping, then rinsing-off, the lens with 100% DEET mosquito repellent works.

I'd want to test the DEET or Brasso on a lense from the junkyard first I think.

also, have you searched Youtube? wouldn't surprise me to discover Brasso has been tried.
 
#14 ·
saw a guy on the local tv channel trying tooth paste, and he mentioned bug spray will melt them.


the slyvania kit I posted has a process, which maybe a lot better then just trying one thing, or part of a kit:

softening agent, different grades of sand paper, polishing paste, and clear coat hardener.


_______

do you got anything really creative tidbits you want to try in the junk yard?

"hot fox urine", " broccoli stalks" , "jaguars' earlobes"

"wolf nipple chips" (might do something if still hot)

?

 
#16 ·
ever spill any in a plastic tacklebox ? it will eat right out the bottom - it's a great plasticizer/solvent.

25% might work just fine - but the issue is cleaning it off to make the new surface duarable. Seems kind like a dead-end compared to the 'lapidary' method. (abrasive polishing)

maybe deet/a good cleaning/clear-coat ?
 
#18 ·
@1 Lucky Texan ...Frank's eyes are just fine...despite not having Eyesight.

They replaced when I bought her...and she's garage kept. I'll save the DEET for Blue Lakes...but it was interesting. I hated chemistry when I was young...I am leaning towards feeling better about it as I age.

I might even use a recipe soon on the Foodie thread. lol.
 
#19 ·
they make (or, used to) 100% DEET

Image


Effects on materials

DEET is an effective solvent,[6] and may dissolve some plastics, rayon, spandex, other synthetic fabrics, and painted or varnished surfaces including nail polish.
from wikipedia

lately, when mosquitos are bad around my place, I've been using 20% Picaridin wipes to good effect.

Image
 
#22 ·
Thanks all, for the fantastic and thoughtful replies.

I'm about to put about $3500 into the Blue Beast (2006, 4 cyl, NA, 153K), and the thought of melting my headlights is not a great comfort to me right about now.

I think I'll avoid Brasso and bug spray.

But I am particularly interested in the 3M, Meguiars, and Sylvania.

Can you tell me how difficult these were to put on? I was hoping to avoid multi-step, masking tape, wet sanding, etc.

I was hoping to just do a 'Miagi' on the headlights and be done with it.

Many thanks!
 
#25 ·
from online reviews I picked the sylvainia $19 kit with a specific model number (containing the most variety of products).

and detailed how it in my linked post.

would I buy it again, ....yes, and avoid all others.

don't want to tape? don't want to wet sand? (when these are superior ideas?)

It is not hard to tape off the painted surfaces adjacent to the head lights. (I used some of their tape, and some 1" wide 3m blue painters tape which sticks good and peels off easy without residue).
(this stops any nicks from the sand paper, and stops any product or residue plastic dust from getting on the paint.)

wet sanding by hand is easier then using a power drill,....which may easily slip with too much speed and hit the painted surfaces a foot away from the light. Doing it by hand is not at all hard on the body. (legs, arms, back. you can even grab a folding chair and do the whole job, if you feel you can't stand for a hour)

and with wet sanding, as part of the regular process you are controlling the amount of friction with the amount of water you are using. (once you start doing it you will see it is a superior technique to any dry process). ....and you can wash away and see how you are doing.

I did mine at the front of the garage on a day with showers, where I had plenty of day light and was out of the rain.

where I could easily use a garden hose to rinse with a mild setting for the spray. I could have also used a plastic picture,....just making sure the rinse water was draining out the door.
 
#23 ·
I used the 3M Headlight Restore kit. It's really just different grits of sandpaper/some compound. But it was in a convenient package.

I followed the instructions (well almost, it was easier to remove the headlights than mask the area as recommended) and the whole process took about an hour. Mask, sand, sand, wet sand, wet sand, wet buff, buff, wax. If I had it to do over, I would get the drill attachment version because my arms definitely got a work out after all the sanding buffing.

The good news is it's cheap, it really works, and not only does the vehicle look better with cleaned headlights, you can SEE better at night. Seeing at night is the biggest benefit of doing all this.

My truck headlights were pretty useless at night, to the point I was thinking of upgrading them/supplementing them with additional lights.

Cleaning the lens made it so much better to see at night, I have no need for more lighting now.

Here is the only picture I took, one as it was and one treated for a before/after effect.
 

Attachments

#27 ·
you can try if they are damaged I guess.

BUT. the thing that makes the headlights go bad vs. the actual road sand is the "sun" which does not really hit down low into the fog lights on most cars.

and you can find sun ruined headlights even where the car is used where there is no road sand.

______

I guess if someone parked it facing south.

______

but if they are still clear, no need to bother with them. If not, probably only take you 20-30 more minutes while doing the regular lights.

(I did not touch mine, both cars still clear).
 
#30 ·
Remember, without sealant it will haze up again within a few months.
I will add the clear coat next time I do mine. Will also do a full color sanding and compounding to get rid of the orange peel. I also use the HF poliching kit in conjunction with the 3M kit.

Note, you will still get some yellowing, halogen headlights put out UV, so the inside is getting bombarded also, eventually it will haze from the inside out, just not as much.
 
#31 ·
I used plain old white toothpaste (white paste, not gel: think of original Crest or Colgate) on my '05 Passat. Do it a couple of times with an old toothbrush. When you're done, apply a good coat of wax. The results weren't 100%, but it was a huge improvement from the cloud that was there. Best of all? It cost about $1 and a little time and elbow grease.

Before and after picture attached. That was two applications of toothpaste, using a toothbrush and my fingers to "buff" it around. Rinsed with water, wiped with a clean dry towel, then applied a coat of ordinary wax.
 

Attachments

#32 ·
Sandpaper, start at 800 grit, work up to as high as you can get. pray paint with uv resistant clear

Buff if possible prior to the spray.

Without some sort of UV protection, the fix is only temporary. They only go foggy in the first place because the factory UV protection has come off over the years. You need to add a new layer of UV protection, be it via spray paint, wax or something else